When you’re on the road, there’s nothing like the comfort of a home-cooked meal. After a long day of adventuring in your RV, you will be craving good food. Having a propane stove is a game-changer for anyone who loves to cook while traveling. Propane stoves are reliable, efficient, and provide the convenience of hot meals, no matter where you are. This guide will walk you through the process of installing a propane stove in your RV, ensuring you’re well-prepared for the road ahead next time!
 Choosing the Right Propane Stove for Your RV
When selecting a propane stove, you’ll want to consider the size of your RV and how often you will be using the stove. If you’re with friends, you’ll need to prepare large meals. A stove with multiple burners might be best for that. For those with limited space, a compact model could be more suitable.
Installation Procedure
-
Select the Installation Location
The first step in installing a propane stove is which spot you would utilize in your RV. Whatever place you select, make sure it’s well-ventilated and away from flammable materials. Your stove should be installed on a flat, stable surface to prevent accidents while driving.
-
Secure the Propane Tank
Next, get the desired size of your propane tank. Most RVs have a designated compartment for propane tanks. They are located outside the living space for safety reasons. You have to make sure that your tank is properly fastened to prevent movement during travel. If you’re unsure which size tank to choose, consult with a propane supplier who can recommend the best propane tank for your needs.
-
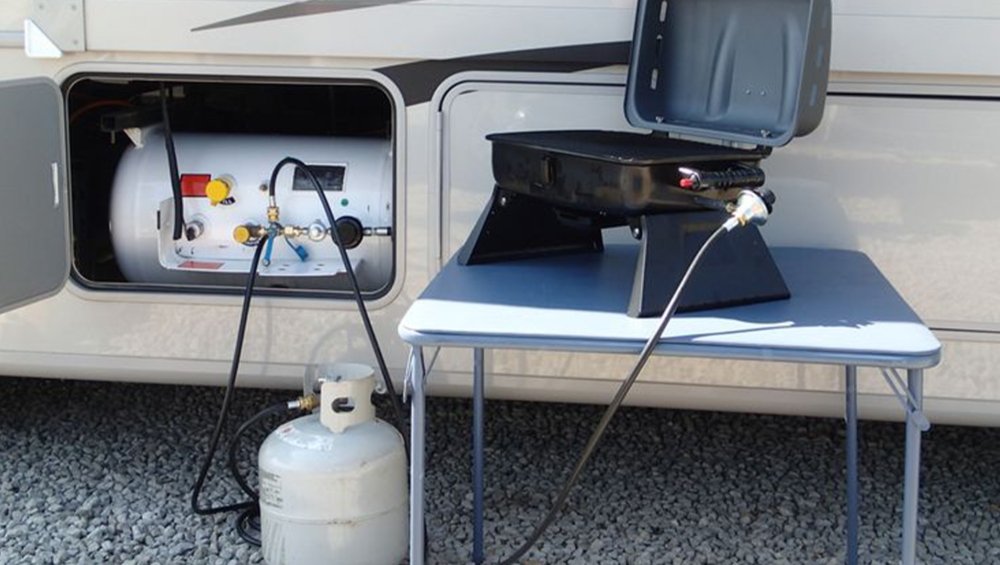
Connect the Propane Line
Connecting the propane line is a crucial step in the whole process. The line is securely attached to both the stove and the propane tank, with no leaks. If you’re not comfortable doing this yourself, it’s best to hire a professional to handle the connections. Never hesitate to seek help from an expert.
-
Test for Leaks
Once the propane line is connected, it’s time to test for leaks. Turn it on and use a leak detection solution to check all connection points. This solution will bubble if there’s a leak. Do check for leaks after you refill your propane cylinder and after maintenance work.
-
Ignite the Stove
Now, you’re ready to light your stove. Follow the manufacturer’s instructions to ignite the burners. If the stove doesn’t light, check the propane supply. Regular cleaning of the burners will keep your stove functioning safely and efficiently.
Safety Tips for Using a Propane Stove
Using a propane stove in your RV comes with responsibilities. Here are a few tips to keep you safe on the road:
-
Always Maintain Airflow:
Make sure your RV is well-ventilated when using the stove to prevent the buildup of propane gas.
-
Get a Gas Detector:
A propane gas detector will alert you if there’s a leak.
-
Regular Maintenance:
Regularly check your propane cylinder, lines, and stove for wear and tear.
-
Know Your Propane Delivery Options:
Whether you’re on a long trip or just preparing for the next one, knowing where to get propane gas delivery near you can be a lifesaver.
Conclusion
Installing a propane stove in your RV opens a world of culinary possibilities while on the road. With the right tools, a little know-how, and access to reliable propane delivery services, you’ll be cooking up delicious meals in no time. Have a great trip!